OFF CAMERA FLASH for beginners
Step by Step Off Camera Flash for any situation - weddings, events, products and more.
Learn these fundamentals and apply it to your workflow.
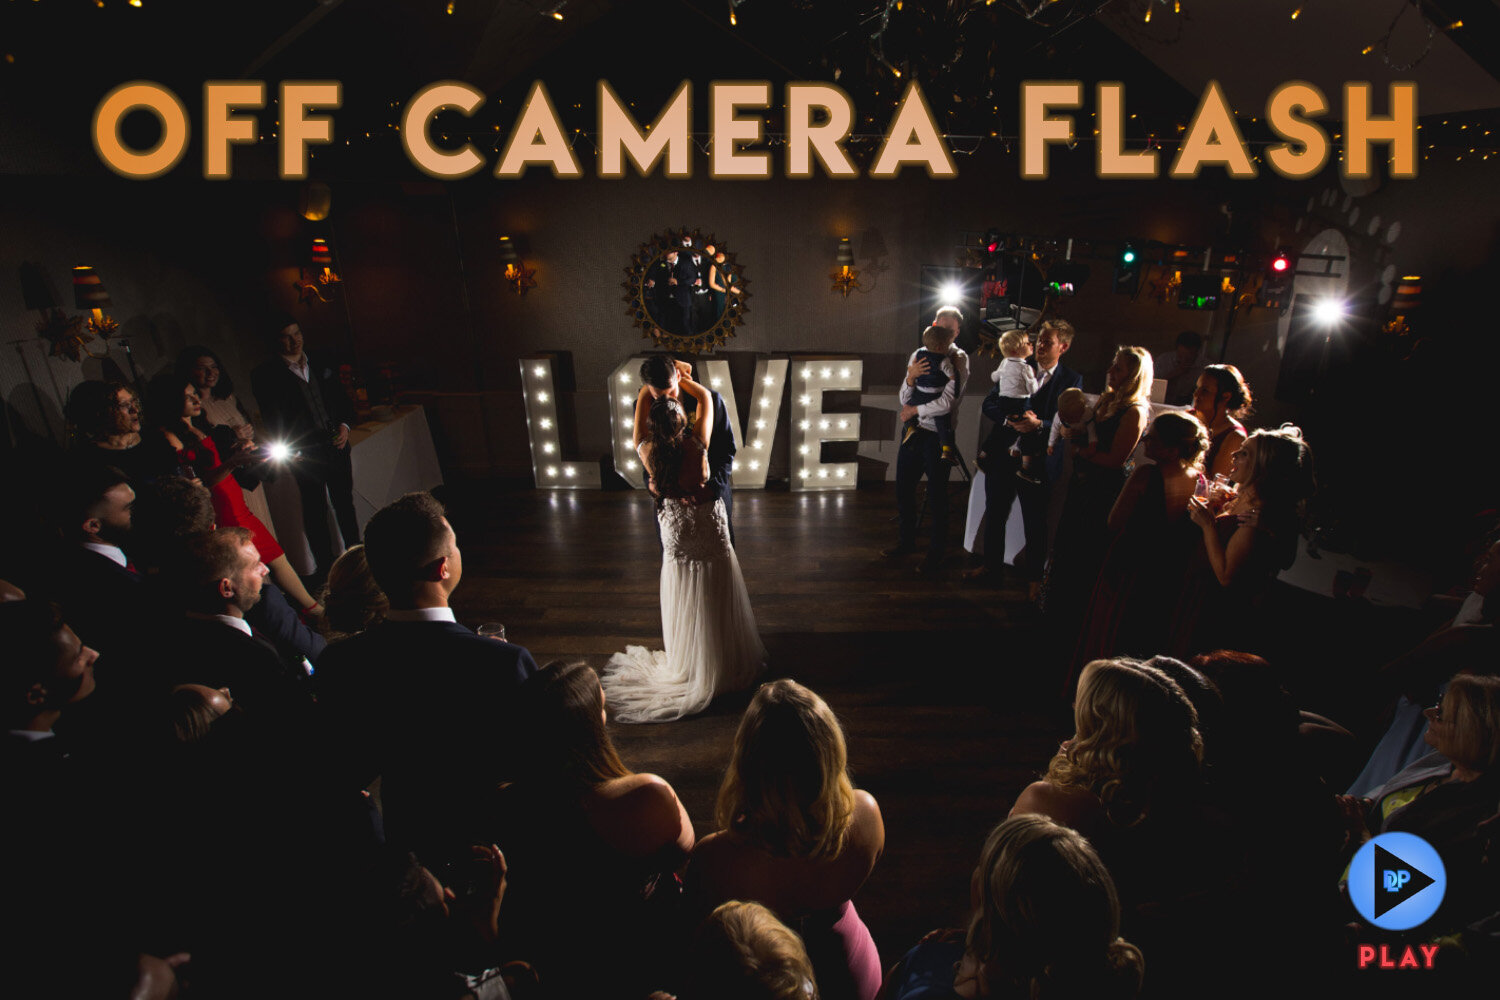
Now this is a great subject. One way to instantly up your game is learn off camera flash. I can’t stress enough how much it improved the quality of my work and what it did for my confidence in low light situations. When I learned the fundamentals, it only took me a couple of weddings before I was quite confident with it, then over time you start to experiment with gels and modifiers, and it doesn’t have to be a hassle, if you’ve been putting it off because you think it’s gonna stress you out on the day or because you’re a natural light photographer, I’m telling you now it’s not hard to learn, it gives so much more diversity to your images and in this example I’ll walk you through how I made the photo above of a first dance using three off camera flashes.
So this is a technique that the more you practice, the better you get (obviously) but when you start getting those first shots your confidence will fly. I’ll run through exactly how I captured that first dance photo and also give you a visual run through of how the flashes were actually controlled, although you’ll have to watch the video for that, it’s easier to explain in the video…
Now it doesn’t matter if you’re photographing weddings, events or products, whatever you’re shooting this workflow remains the same. It also doesn’t matter what speedlites you have, but if you do want some advice on which ones to buy without caining your bank account, the Yongnuo 560IV with their trigger is a great place to start. They each have receive AND transmit functionality, you can set each light’s power and zoom individually or you can group them together. They’re relatively cheap so if you accidentally damage one you aren’t going to get too upset. They don’t tick every box for example they’re manual flashes so don’t have TTL functionality, not that I ever use it, they also don’t have high speed sync, which is where you want to use a shutter speed faster than about 200th/sec depending on your camera and they don’t have second curtain sync, which is where the flash fires just before the second curtain drops, but that doesn’t matter in my opinion, if you need decent flashes, for cheap, that’ll last for years, these are ace so check em out – links below
Also this might be obvious, but you also need something to mount your flashes on, so a decent light stand and an adapter to hold the flashes is required in most scenarios. Option 1 - at one end of the spectrum you’ve got this screwy little grippy ball head which is VERY cheap, you just screw on the speedlite cold shoe adapter that comes with the flash then slot your flash into that - and Option 2 - at the other end of the spectrum but definitely easier to use you’ve got something like the MagMod MagShoe, I used the cheap screwy things for years and depending on your budget you can purchase accordingly, but once you use the MagShoe you ain’t going back
Light Stand Speedlite Adapters (2 options)
“Screwy Little Grippy Ball Head”
Magmod MagShoe
If you’ve already got another brand speedlite that you want to use that’s cool, the principle remains the same for all.
The HOW
So now we’ve got all of that out the way we can get down to the how…So first things first, you want to be shooting in Manual mode. Why? Because you want to control your ambient exposure, and what I mean by that is you want to control everything that your flashes don’t light up (the light in the room) so set your camera to manual and get an exposure for the room that’s very dark but not pitch black. In the example below I want to capture the love letters, the wall lights and the fairy lights only and the rest of the image is pretty much black. This is because my flashes, when I turn them on, will expose the subject (the bride and groom)
For this shot, my settings are:
ISO640 | f/4.0 | 160th/sec
IMPORTANT
(Remember not to go faster than 200th/sec with these particular flashes otherwise your speedlites and camera will NOT be in sync!!! - In these scenarios I generally set my shutter to 160th/sec first, then my aperture to anything between f/2.8 and f/4, obviously f/4 is more forgiving than f/2.8, but f/2.8 gives a better look because of the shallower depth of field, and lastly I set my ISO. Always ends up being between 1000 and 2500. Set your camera in this order and you can’t go wrong)
PHOTO 1
So let’s jump into this first dance. So I’ve selected six photos here to look at, the first shot is my ambient exposure, just bright enough to expose for the love letters and the wall lampshades. Now you can’t see them here but the bride and groom are right in the middle of this image and if I crank the exposure up max you can see them there.
Ambient Exposure (Flash Trigger off)
Same shot but with exposure cranked up max in Lightroom to show where the couple are
PHOTO 2
My next shot, I’ve switched on my flash trigger and now you can see the couple.
Switch my Flash Triggers On
Before you tear me apart for my composition here this was just another quick test shot before getting stuck in. The power of my flashes were set to 1/64th power, so really low power. The zoom of the flashes I always set to their longest focal length in these scenarios so 105mm because I want to have a very narrow flash beam, and I also use Selens honeycomb grids to focus the lights even more directly, limiting the spread of light as much as I can. I’ll leave a link to these modifiers below and make another blog/video on how I use them at weddings, keep an eye out for that. In the image above you can see one flash behind the groom, that creates a rim light around him and I’m looking at the bride here and checking she’s not over exposed. I’m happy with these settings so off I go. I can of course change the speedlite settings individually here, say if the exposure was too bright from one particular flash I can change the power of each flash individually before I continue to shoot the first dance, more on that in the video.
PHOTO 3
From the other side. Note the guest holding my flash - Legend
This next photo is from the other side, it shows the flash that was lighting the bride in photo 2 above. Now you might be wondering why a guest is holding the flash, there isn’t any real reason for this, I did have my light stand ready but I think she just said can I help, just offered to help and I thought yeah great, why not, hold this flash and point it at them, I didn’t over think it, if anything I thought it could be quite nice thing to happen. Anyway, you can see on the right of the frame, the chaps head is being lit from the other flash that was behind the groom (see photo 2 above)
PHOTO 4
Wide shot shownig all three flash units (click to expand)
I’ve set them into separate groups so I can control them individually (click to expand)
So, moving forward again, this wide shot gives a great idea of my three flash positions. And I’ve set these up into three groups, A, B and C, so I can control each flash’s power individually directly from the trigger on top of the camera – more on that in a sec - but on the left you can see my mate, whatever her name was, holding flash A, then flash b at the back and flash C on the right. All set to the same power.
These photos are straight out of camera by the way – raw…Don’t judge…They’re naked.
PHOTO 5
Shot 5 shows only one flash firing, B and C were slow to recycle or something but what this photo does show quite nicely is how my ambient exposure still captures the love letters, the wall lights and the fairy lights nicely, I know flash A has still fired but you can still see what I get from the ambient exposure.
Flash B and C haven’t fired
PHOTO 6
Then shot 6 shows that Flash B and C are back awake again….
All flashes awake again
Now, obviously there were more than just these three but to keep it simple here they are once they’ve had an edit. (Click to Enlarge)
RECAP
So let’s recap - you firstly set your camera to manual and get your exposure for ambient light and when you’ve done that, you turn on the trigger and set your flash powers and zooms. The more you do this the better you get at setting your flashes to the right power straight off the bat, after half a dozen weddings I was able to set the flashes to the right power as well as my camera to the right settings and without even making a test shot knew that I’d be either bang on to or very close to the settings I wanted. It’s all about practice.
NOTE
If you want to see how I set up the flash unit individually and controlled the power of each unit separately you really need to watch the video at the top.
It doesn’t matter what brand of speedlite you have, whether you shoot canon, sony , Nikon, fuji, whatever, these principles apply globally. The only difference of course is that your speedlite and camera may have buttons in different places. So shoot in manual, set your ambient exposure (shutter then aperture then ISO), then set your flashes. That goes for weddings, products, whatever you’re shooting, follow that procedure, practice and you’re away.
Before I go, these flashes also have another great function. It can act as a master flash, so when it sits on the top of the camera you press the shutter and not only does this one fire, it triggers the other flashes around the room to fire too. This is especially great when you’re on a busy dance floor or when you’re amongst a load of people and your flashes around the edge of the room become blocked by guests, because it’s busy.
Please support me by subscribing to the youtube channel and like the video too, of course if you have any questions let me know in the comments on here or YouTube.
Cheers,
Dan

