CUSTOM Picture Styles - How & Why you should make your own

Custom Picture Styles
It doesn’t matter if you shoot in raw or jpg, whether you’re a professional making money from photography or an amateur who loves shooting at weekends, I want to show you how to make and install your own custom picture profile on to your Canon camera. Why should you have a custom picture profile? Well, there’s a couple of reasons. Firstly if you’re shooting raw, wouldn’t you like to review your images in camera so they look like how you’re gonna edit them? Or Secondly if you shoot jpg, do you want to take your images to the next level? We’re all used to changing the Sharpness, Contrast, Saturation and maybe even the Colour Tone but what if you want to take it that little bit further, that little bit more punch, that x factor, give it that secret sauce - a picture profile that applies an edit to those raws or jpgs so when you review your photos in camera they look like you could deliver them there and then or even if you’re more of a hobbiest and shoot jpg all the time then you can use this feature to enhance the quality of your photos and give them a seriously professional look.
Don’t worry, this isn’t difficult to do and the potential is huge, in fact the first time I did this I couldn’t believe I hadn’t done it sooner, it was really exciting because to have the image on the back of your camera close to how you would edit gives you a really good idea of what you’re going to deliver to the client.
As I’ve already said it doesn’t matter if you shooting raw or jpg, whether you’re a professional making money from photography or an amateur who loves shooting at the weekends. This feature has implications for everyone. I shoot raw 99% of the time, obviously, and use my custom picture profile only for reviewing my images in camera so they look just like my editing style, but I also occasionally shoot jpg too. When I’m photographing my family or kids either in the garden or on a day out, I don’t necessarily want to go home and start editing these images. I love photography but I also don’t want it to cut into my personal family time, I want the images I make on a family day out to be ready to use and print straight out of camera. They don’t need to go through the same rigorous editing process as all my professional photos, and if they did I wouldn’t have anywhere near as many images of my family because editing takes time and energy. If I can use a custom picture profile for my personal photos and shoot in jpg, I still get amazing photos and it enables me to be more present as a dad.
So if you shoot in raw, if you didn’t know already, when you press that review button on the back of the camera, you aren’t looking at the raw image, you’re seeing a jpg ‘sidecar’ image, and the jpg is built based on the settings you’ve set in your picture profile. Then of course when you import that image into your editor what you see is the raw file, so raw shooters, this is only about reviewing images in camera, it has no effect on your raw files, it’s about visulisation, about staying in the zone on a shoot and also it’s nice to be able to show your clients a few sneak previews, that look mint.
Jpg users, this is about taking your images to the next level with free software
I’m gonna use my Canon 5D Mk4 for this but this procedure will work for any canon camera. If you’ve got a different brand of camera, I’m sure you can do this too.
The HOW
So firstly, you need to download Canon’s EOS Utility, Select your camera, your operating system, download and install.
Next, download and install Canon’s Picture Style Editor, again you’ll need to select your camera and operating system before you install.
These steps are very quick and easy.

EOS Utility

Picture Style Editor
Open picture style editor and have a raw file at hand to edit. Either drag and drop or select file and open to load the raw image into the editor. You’ll see that you’re presented with three tabs across the top.
BASIC
SIX COLOUR AXES
SPECIFIC COLOURS.

Basic Tab
Now here’s where you get creative and set the sliders to your look and you’ll see a live edit on the raw image in the adjacent window. The best thing about this basic section is without a doubt the tone-curve. Being able to apply your own custom tone curves to your picture profile is something you can’t do in camera, I love this feature.
The next tab is the SIX COLOUR AXES. This is where you can change the Hue, Saturation and Luminance, or the HSL of a colour range so you have access to your RGB but also Cyan, Yellow and Magenta too.
The last tab is SPECIFIC COLOURS, this is where you can apply HSL adjustments to specific colours.
Now depending on what you’re shooting, you’re going to need to have a little play around with this to get it just right. Let’s say you like a warmer tone to your images, you might want to boost the saturation of the yellows, reds, oranges so give them a little more punch. Or maybe you like a rustic look with desaturated greens, low contrast, raised blacks. Whatever your style, and there’s no right or wrong, whatever your style you should try this out to see how it works for you. The beauty of this is that you can do just that. Try it out. It’s easy to change your picture profile during a shoot, it’s just three button presses so if you don’t like what you’re getting, just go back to your other one that you always used and then tweak your custom one for the next shoot and keep tweaking until you get it right. That’s what I did and now I love it. In fact, because the 5D Mk4 has three custom slots for picture profile I use one for general wedding shooting and another for the evening party which is much warmer and with higher contrast. I have my third one which I use for my personal family jpgs but I’ve also started to build a few more all for different commercial projects and I can load them into the camera before I go on that project, back onto the process though…

Six Colour Axes Tab

Specific Colours Tab
On the editor window you can compare the raw file to the edit you’re applying and now I’ll save this profile, I’ve already done a light s-curve on the basic tab, that raised the black level and gave some extra contrast, and I’m also going to give a slightly warmer look on the SIX COLOUR AXES Tab I’m going to increase the saturation of the yellows. I’m going to leave the specific colours alone for this example. Next I click save, call it whatever you want and add a caption as this is what appears in camera, although note that you only see the first 15 characters of this caption in the camera. That’s your colour profile saved and now you need to load it onto the camera.

Add a caption and Save
To Load it into the camera you do this in EOS utility, so plug in your camera to your computer using the usb cable, and the EOS utility software should open automatically but if it doesn’t, just open it yourself. Hit camera settings and this opens up a nice little menu where you can easily update your firmware and change other settings. I recommend updating your firmware too because, well why not,

EOS Utility Menu
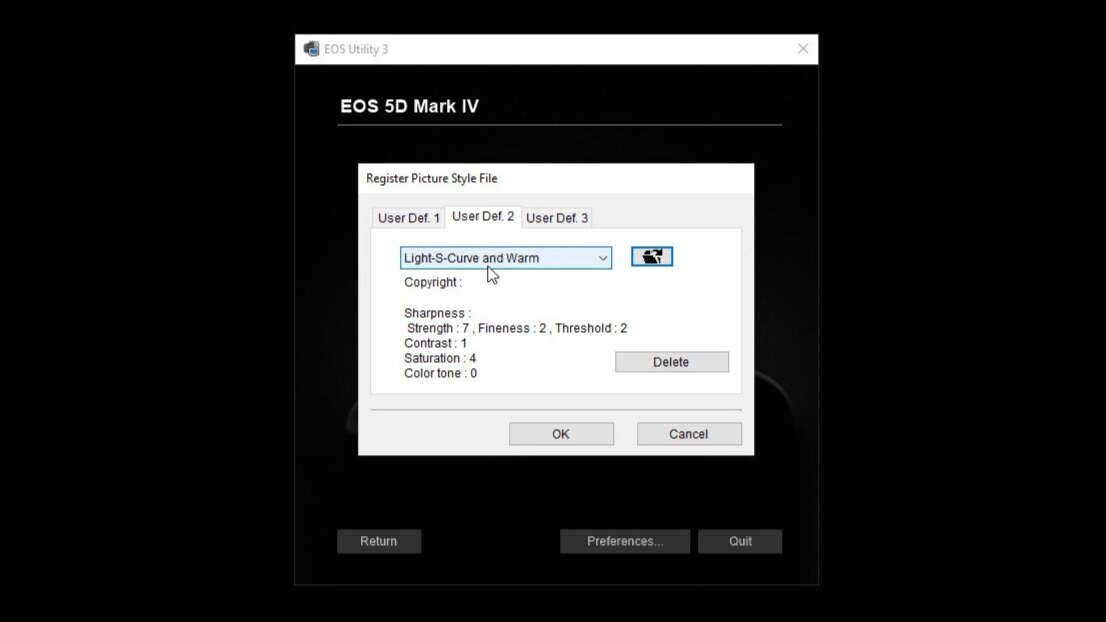
Choose your User Def. Style Slot
Click on register picture style file, choose which user defined slot you want to use, open the file you saved earlier, it’ll load that in, click ok. That wasn’t hard was it.
So in the camera, all you have to do now is select the profile you made and go and shoot something.
Remember that if you’re shooting raw then your picture profile is purely for reviewing the image on the back of the camera. When you import the images into an editor such as lightroom you only see the raw image so you picture profile becomes irrelevant, if you shoot jpg however your picture profile becomes baked into the image.
Incidentally, if you’ve ever wondered about technicolour cinestyle picture profile to increase the dynamic range of your dslr videos, you use this procedure to install that picture profile and you can download Technicolour’s profile direct from their website.
But back to your style, this is something to go away and have a play with, obviously I’m talking to all the canon users out there, but I’m sure you can customise whatever brand you’re using.
It’s really a great tool to use, it’s so nice to be able to view images on the back of the camera and see roughly what they’ll look like when you edit them and of course it’s something you can easily turn off too, If you’re not seeing what you want you can always go back to your old picture profile at the press of 3 buttons so go and explore, have some fun with it.
Cheers!
Dan